Hand Tracking
Introduction
VIVE Wave™ XR plugin provides the Hand feature in the XRSDK and Essence packages. (refer to Wave XR Plugin Packages).
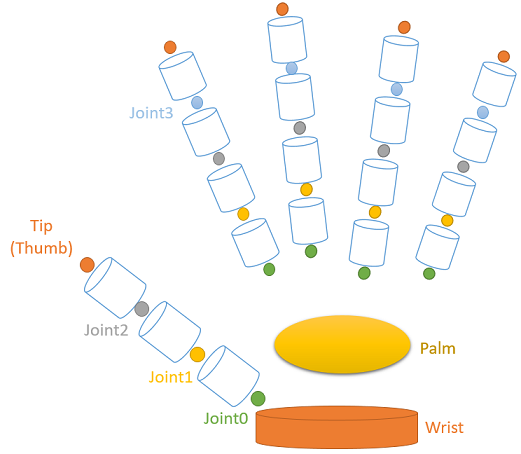
VIVE Wave™ XR plugin defines the hand joint as below illustration.
The Hand functionality within the VIVE Wave™ XR plugin offers two key features: Hand Tracking and Hand Gesture.
Once you have imported the XRSDK or Essence package and enable Hand Tracking, you can access the hand joints poses and motions (e.g. Pinch, Hold).
Refer to Unity XR InputDevice - Hand Tracking about the Hand Tracking API in XRSDK package.
Refer to Wave Hand Tracking Interface about the Hand Tracking API in Essence package.
Modify AndroidManifest.xml
To enable the Hand feature, you have to add below content to your AndroidManifest.xml.
<uses-feature android:name="wave.feature.handtracking" android:required="true" />
VIVE Wave™ XR plugin provides the Project Settings > XR Plug-in Management > WaveXRSettings > Hand option to modify the AndroidManifest.xml and enable Hand Tracking automatically.
Note
Enabling Hand feature consumes additional power.
Golden Sample
Note
You have to enable VIVE Wave™ XR plugin from Project Settings > XR Plugin-in Management > Android tab > Wave XR to run the VIVE Wave™ SDK application in VIVE Focus3 or VIVE XR Elite.
Follow steps below to create your first hand tracking sample. You will have below contents in the sample.
- A Camera with HMD tracking. (Refer to XR Rig for more detail.)
- A hand-clickable button.
- Hand models. (Refer to Hand Model for more detail.)
- Raycasts. (Refer to Raycast for more detail.)
- Create a new scene named HandTrackingSample and remove the Main Camera.
- Configure Environment:
HMD Pose: Drag the Wave Rig prefab from Packages > VIVE Wave XR Plugin - Essence > Runtime > Prefabs to HandTrackingSample.

Hand Tracking: Add the Hand Manager to Wave Rig and select
Initial Start Natural Hand.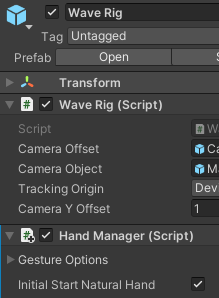
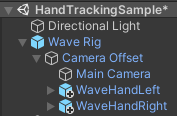
Add Hand Models: To make the hand models follow the camera, place them under Wave Rig > Camera Offset.
Drag the WaveHandLeft and WaveHandRight prefabs from Asset > Wave > Essence > Hand > Model > {version} > Resources > Prefabs to beneath the Camera Offset.

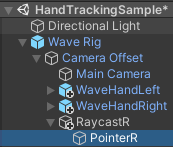
- Add Raycast for Hand Interaction: Only the hand with raycast can interact with a GameObject like Button.
Create a new GameObject named RaycastR under Camera Offset.

Add the Hand Raycast Pointer component and select the
Always Enableoption. (We don’t use the Raycast Switch component here. You can refer to Raycast for more detail.)Set the
Ray MaterialtoDefault Line.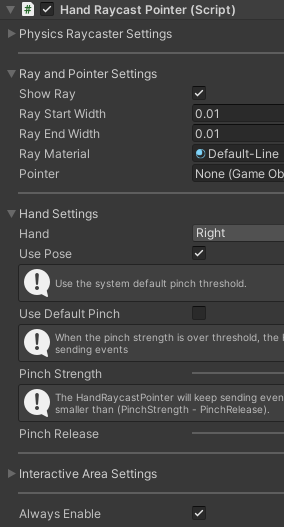
Create a GameObject named PointerR under RaycastR.
Add an Image component to PointerR, use the Unity Knob as the
Source Imageand change theScale.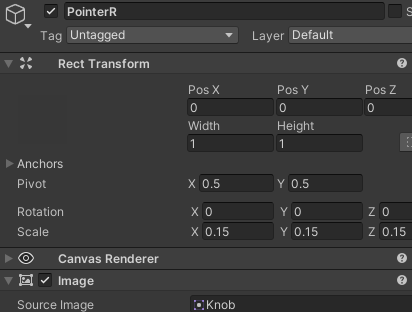
Set the
Pointerof Hand Raycast Pointer to PointerR.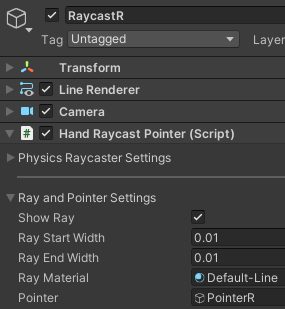
- Add Button:
Add a button from the menu item GameObject > UI > Button.
Remove the Event System from HandTrackingSample.
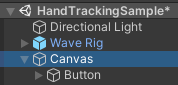
In the Canvas object, change
Render ModetoWorldand adjust the Rect Transform as shown.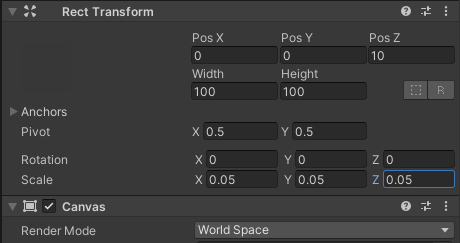
- Connect Button Event: Implement a function to handle the button click event.
Go to Canvas > Button > Text, select Add Component > New script with the name ClickCounter, and click Create and Add. You can find the ClickCounter at Assets.
Copy and paste the provided code into ClickCounter script.
using UnityEngine;
using UnityEngine.UI;

public class ClickCounter : MonoBehaviour
{
    private Text m_Text = null;
    private void Awake() { m_Text = GetComponent<Text>(); }

    private uint m_Count = 0;
    private void Update()
    {
        if (m_Text != null)
            m_Text.text = "Clicked: " + m_Count;
    }

    public void OnClick() { m_Count++; }
}
In the Canvas > Button, click the “+” of the
On Click()function.Drag the Canvas > Button > Text GameObject to the newly added
On Click()function and specify theClickCounter > OnClickfunction.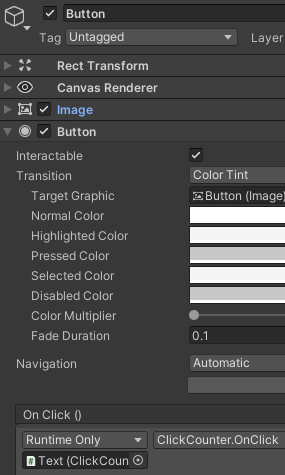
- Run Application: In the application runtime, you can “pinch” (thumb tip and index tip get closed) to interact with the button.
Unity XR Hand Interface
Unity XR provides the Bone and HandFinger data.
You can check the sample NaturalHandXR at Assets > Samples > Wave > XR > XR > Hand. (Refer to Samples to import the Wave XR Plugin Samples.)
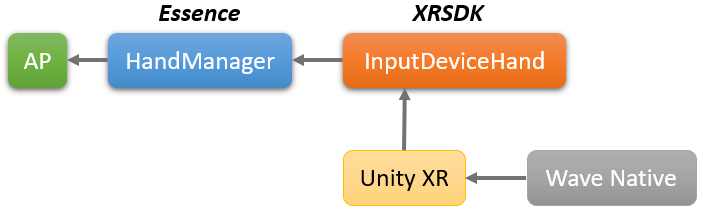
You can access the data through the Wave.OpenXR.InputDeviceHand interface which is included in the XRSDK package.

Before accessing the Unity XR Hand data, you have to enable Hand Tracking by either
Using the following code
Wave.OpenXR.InputDeviceHand.ActivateNaturalHand(true)Refer to Unity XR InputDevice - Hand Tracking about the InputDeviceHand API.
Or select the option: Project Settings > XR Plug-in Management > WaveXRSettings > Enable Natural Hand.
Hand Manager
The HandManager is included in the Essence package and used to provide all hand tracking data.
You can check the sample NaturalHand at Assets > Wave > Essence > Hand > Model > {version} > Demo.
In your scene, you can add the HandManager component from the menu item Wave > GameObject > Add Hand Manager.
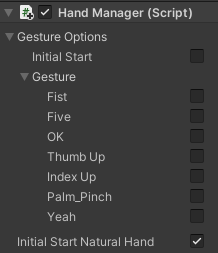
Gesture Options: Default disabled. Selects to start the Hand Gesture by default with required DEFAULT gesture types in runtime.Initial Start Natural Hand: Default disabled. Selects to start the Hand Tracking by default in runtime and will consume additional power.
Note
Please refer to Wave Hand Tracking Interface about the HandManager API.
Joint Pose
By adding the JointPose component to a GameObject and setting the Joint, the pose of a specific bone will be applied to the GameObject.
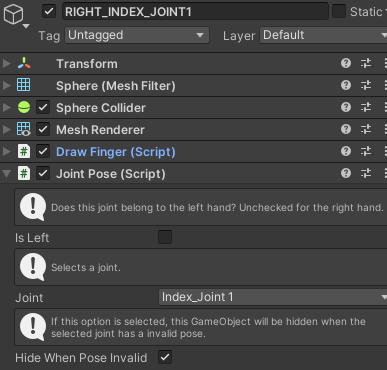
If the Hide When Pose Invalid option is selected, the object will be hidden when the specific joint pose is invalid.